
A custom tin box can leave the packing area looking perfect and still arrive with a shallow lid dent, pressed corner, or distorted edge. The outer carton may look completely normal: the tape is intact, the walls are square, and there is no obvious crushing. Then the carton is opened and several tins show marks in similar positions.
Often, the problem is not one dramatic impact but repeated movement inside the pack. A row shifts slightly. A corner meets a hard surface. A divider becomes a pressure point. At the same time, stacking changes the load carried by lower cartons. Reducing dents therefore starts with understanding where the tin can move and where that movement eventually stops.
The practical answer
Dent prevention is mainly about controlling the load path. Keep hard contact points away from vulnerable surfaces, limit unnecessary movement, and let carton and pallet pressure travel through supported areas.
A carton can look tightly packed and still allow damaging movement. The important question is not whether every empty space has been filled. It is whether each tin can slide, rotate, rise, or press against another hard surface during handling.
Once that distinction is clear, packing becomes less about adding more material and more about placing support where it actually changes the way the product moves.
Start with the damage pattern
Where Dents Develop During Export Handling
The position of a dent often gives the first clue about what happened inside the carton. A mark close to the carton wall suggests a different problem from a shallow depression in the middle of a lid. Damage concentrated in the lowest pallet layers points toward another part of the packing system.
Broad flat panels show pressure marks easily, while corners, rolled edges, hinges, and closure areas can act as hard contact points. Before changing the carton or adding cushioning, identify which surface is being loaded and what is likely touching it.
Repeated marks usually have a repeatable cause
If several tins from different cartons show a dent in almost the same position, the pattern is useful evidence. A divider edge may be sitting too high. A neighbouring rim may be landing on the same part of the lid. A layer pad may be carrying pressure through one small area.
Random marks usually point in another direction. They are more likely to involve uncontrolled movement, occasional carton-wall contact, or units rotating differently during handling.
|
Repeated lid dents Look for a repeating vertical contact point above the lid or a hard feature transferring stacking pressure into the same area. |
Wall-side marks Check for loose rows, excessive side clearance, or units reaching the carton wall before the rest of the pack stops moving. |
Lower-layer damage Review carton compression, pallet support, stacking alignment, and how upper loads are being transferred. |
Separate the surfaces that can collide
Protect Each Tin by Controlling the First Hard Contact
Good internal protection does not necessarily mean wrapping every unit in soft material. In many cases, the more useful change is simply to stop one hard feature from reaching a vulnerable surface.
A hinge can become an impact point. A rolled rim can do the same. On an angular tin, one corner may reach a neighbouring unit before the wider side makes contact. The packing design should therefore make the stopping point deliberate rather than accidental.
Orientation matters for the same reason. When every unit follows the same direction, contact points remain predictable. If some tins rotate between rows or layers, clearances change and a previously harmless edge can move into a vulnerable position.
The aim is not to eliminate every bit of space. It is to prevent enough movement for a rim, hinge, edge, or corner to become an impact point inside the carton.
Product geometry changes the packing answer
How Irregular Tin Shapes Change the Packing Logic
A rectangular tin normally fits into a predictable grid. Irregular shapes create corners, angled faces, pockets, and changing contact points. A carton can therefore look full while individual units still have room to rotate or shift.
Triangle and hexagon tins make this especially easy to see. Their geometry is different, so the way each tin should be supported is different as well.
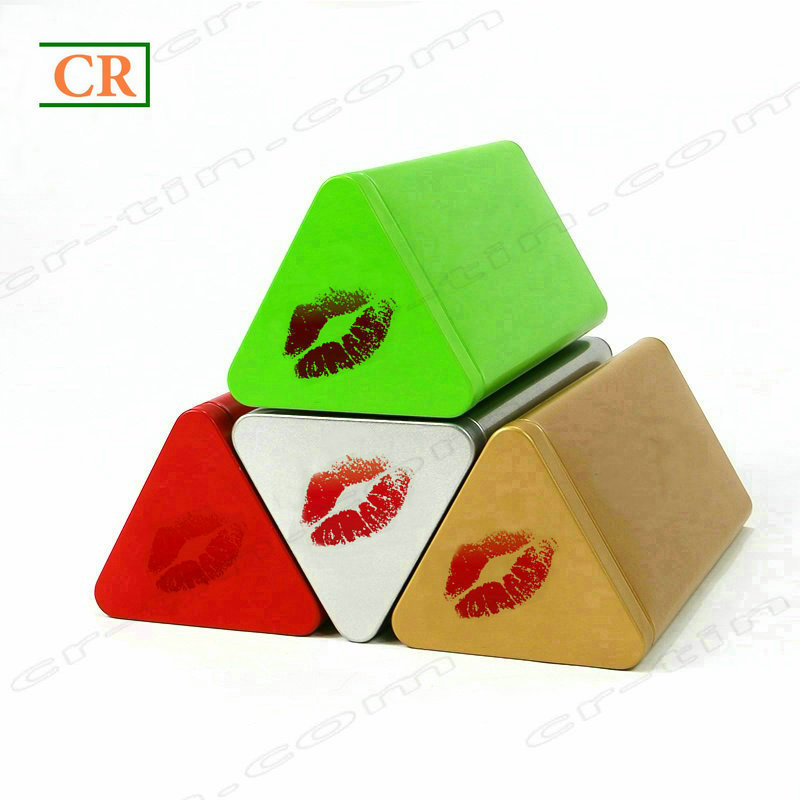
Hexagon geometry creates a different movement pattern. Several angled faces may appear to sit neatly together, but extra clearance can still allow the tin to rotate. On a hinged format, that rotation may eventually move an edge or hinge into contact with the next unit.
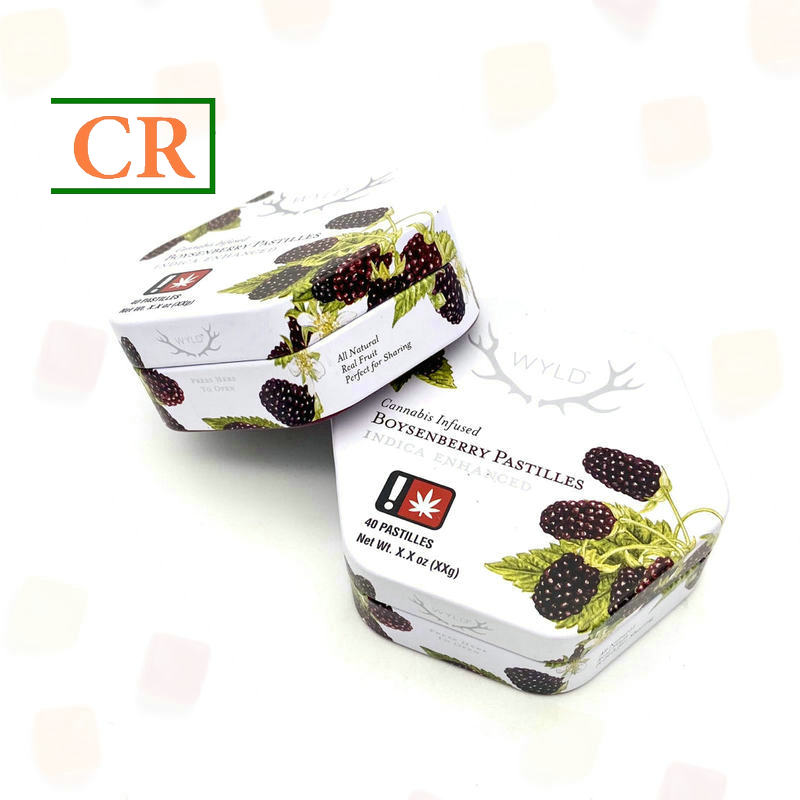
The shape should decide the support points
This is where generic packing layouts can fall short. A rectangular cell may hold an angular tin in one direction while leaving another direction relatively free.
A better approach is to look at where the actual tin naturally wants to move, then place the divider or support where it limits that movement without creating continuous pressure on a delicate panel.
Build protection from the inside out
Use Dividers, Inner Cartons and Master Cartons for Different Jobs
A strong master carton protects the shipment from external handling and helps carry stacking loads, but it cannot stop loose tins from hitting one another inside the case. Internal packing and outer-carton strength solve different parts of the same problem.
Dividers are most useful when they separate rims, corners, hinges, or other hard features from neighbouring surfaces. Inner cartons can help when a large master case contains many units and smaller groups are easier to keep aligned.
|
Divider Separate hard contactUse the divider to control where one tin stops relative to the next, especially around rims, corners, hinges, and other concentrated contact points. |
Inner carton Keep the group alignedAn inner carton can reduce larger movements within a master case and help preserve the intended orientation of each layer. |
Divider height and cell width both matter
A divider that reaches too high can become a new pressure point. If its upper edge sits beneath the next layer and directly over a broad lid, stacking force may concentrate where the divider touches.
A divider that is too low can leave enough freedom for the tin to shift. Cell width behaves in much the same way: too loose and the product travels; too tight and the packing itself can press continuously against the tin.
There is no single clearance that works for every shape. A triangular tin, a hinged hexagon tin, and a shallow rectangular tin can behave differently inside the same style of carton. The useful test is whether the tins stay located without constant pressure on the lid, edge, hinge, or another vulnerable area.
Empty space only matters when it becomes moving space
Control Void Space Without Overpacking the Carton
Void space is not automatically a defect. Some clearance can make packing easier and prevent the tin from being forced against dividers or neighbouring units. The problem begins when that clearance becomes enough travel for a product or an entire row to build momentum.
|
Side void Watch horizontal movementExtra clearance beside a row can allow tins to slide before they meet the carton wall or perimeter support. |
Top void Watch layer movementClearance above a layer can allow tins or pads to lift and settle repeatedly, but overfilling the top can create constant lid pressure. |
Do not fill every irregular pocket
This is particularly important with non-rectangular shapes. A triangular pocket may look like wasted space. A gap around a hexagon may look untidy. Filling every visible space with rigid material can create a new contact point without actually improving stability.
Instead, look at what the tin does when the carton is handled. If the product remains in position, the gap may be harmless. If the unit rotates, slides, or rises before reaching support, that is the movement the packing needs to control.
A simple check before approving the layout
Close the carton normally, handle it in the way it will actually be moved, then reopen it. If rows have shifted, units have rotated, dividers have moved, or fresh marks have appeared beside a wall or contact point, the packing is showing where the next adjustment is needed.
Protection continues after the carton is closed
Stacking, Palletisation and Container Handling
A packing layout that works as a single carton can still fail once many cartons are stacked on a pallet. Lower cartons now support the load above them, so poor pallet support or uneven stacking can change the pressure reaching the tins inside.
Cartons should stay within the supported pallet footprint. Overhang leaves part of the case without proper support and makes the outer walls more likely to deform inward. The same problem can occur when the pallet deck does not support the base of a lower carton evenly.
|
BASE Keep the carton footprint properly supported so lower cases do not flex across unsupported pallet areas. |
STACK Keep layers aligned and the pallet square so vertical load is not concentrated unpredictably through one side. |
RESTRAINT Use wrap or strapping to stabilize the load without pulling carton corners and walls inward. |
Ocean export also involves more than the time spent inside the vessel. Cartons may pass through warehouse handling, pallet movement, container loading, unloading, and onward transport. A layout that is stable only while sitting still in the packing area has not really solved the problem.
Do not let pallet restraint create a new dent risk
Stretch wrap and strapping help hold the pallet together, but concentrated restraint can deform carton edges or side walls. From the outside the pallet may look secure while the internal clearance has already changed.
Before loading, check whether the carton walls are still square, whether corners have been pulled inward, and whether the lower layers remain fully supported.
Validate the actual packed carton
Use a Packing Trial Before the Shipping Pattern Is Fixed
A packing drawing shows the intended arrangement. A closed carton shows how that arrangement behaves in practice. With irregular tins in particular, small differences in divider placement or clearance can be difficult to judge from a drawing alone.
Start with clean products so new pressure marks are easy to identify. After the carton has been closed and handled, open it again and compare tins from different positions: near the walls, at the corners, in the centre, and from upper and lower layers where applicable.
Look for patterns rather than isolated imperfections. Has one row rotated? Has a divider moved? Is there a fresh mark beside the wall? Are similar dents appearing in the same place on several tins? Those clues help distinguish movement problems from repeated pressure points.
Use an approved packing reference during production
Once a layout works, production packing still needs to stay consistent. A missed pad, reversed orientation, shifted divider, or different row arrangement can change the way load travels through the carton.
An approved packing photo or packing sheet can therefore be more useful than a long inspection form. It gives operators and inspectors a clear reference for orientation, divider position, layer arrangement, carton closing, and pallet pattern.
What matters during a random check
Open representative cartons and confirm that the tins have no new pressure marks, the approved orientation is still being followed, dividers remain where intended, the carton closes square without obvious bulging, and the pallet stack remains supported without overhang.
Give the packing supplier enough information to diagnose the problem
What to Confirm Before Finalising the Export Pack
Packing decisions become much easier when the discussion starts with the actual tin rather than a generic carton specification. Shape, outside dimensions, closure style, hinge position, raised areas, and other structural details all affect where contact is likely to occur.
Shipment details matter as well. Units per carton, carton dimensions, approximate gross weight, destination, pallet arrangement, and any inspection requirement can change the way the pack should be supported.
If dents have already appeared during shipping, photos are especially useful. A photo showing both the damaged area and its position on the tin often reveals more than a general complaint that several boxes arrived dented.
A drawing gives the overall geometry; a representative sample shows the finished edges and contact points. Together with the existing packing layout, those details provide a practical starting point for deciding whether the problem lies in orientation, clearance, dividers, carton support, or pallet loading.
Common questions
FAQ
|
Why can tins dent even when the export carton is not crushed? The carton can remain visually intact while products move inside it. Tins may contact neighbouring rims, dividers, or carton walls, and stacking pressure can also reach a vulnerable panel through a hard internal contact point. |
What information is most useful when diagnosing dents after shipping? Useful information includes the tin shape and dimensions, clear photos of the dent locations, units per carton, carton dimensions, divider arrangement, approximate gross carton weight, pallet pattern, and affected carton positions if known. |
Review the packing plan
Check the Export Pack Before the Next Shipment
If you are developing a new tin package, provide the tin dimensions, shape, quantity, destination, and intended carton arrangement. A drawing or representative sample is useful when corners, hinges, or other structural details affect how the tins contact one another.
If you are already seeing transit dents, include photos of the damage and the current packing layout. That makes it easier to review whether the likely cause is product movement, a repeated contact point, carton compression, or pallet support.
Post time: Sep-18-2026