
An empty tin can look generous on a drawing. Once an insert enters the cavity, that picture changes quickly. Dividers, pocket walls, retaining edges, finger access and removal space all consume part of the working area. In pre roll tins, the final packing capacity depends on the loaded arrangement rather than the empty shell alone. That difference becomes especially important when several tapered products share one compact interior.
The practical point
The insert is part of the packing volume calculation. It creates useful structure, but that structure also takes space.
Picture a new sample on a packing table. The metal shell looks large enough, yet the first few products already sit close to the sidewalls. After the remaining units enter, the center lanes become tighter. Suddenly, the “extra space” seen in the original tin drawing has disappeared.
That situation is easier to avoid when layout work starts with the finished product. The required quantity, product direction and removal motion should come first. Then the insert can support the pack instead of forcing the product into whatever volume remains.
Start with the loaded envelope
Gross Internal Space vs Usable Space
Gross internal space describes the empty cavity. However, the cavity itself may already contain rounded corners, rolled edges, hinge areas or other structural restrictions. A basic length-by-width calculation can therefore overstate the space that products can actually occupy.
Usable space appears after those restrictions are considered. Next, the insert adds another layer of structure. Sidewalls, dividers, pocket webs, bridges and retaining edges reduce the remaining product envelope. The practical question is not how large the cavity looks. It is how much room remains after the useful features are included.
Measure the finished product, not an idealized product
Tapered products make this especially important. One diameter cannot describe the complete shape. The wider body section may control lane spacing, while a seam or folded paper edge creates another local contact point.
A strong layout brief records overall length and the widest practical body area. When several production sizes may share one pack, representative pieces from the smaller and larger ends of the range should also be considered. That simple check helps prevent a pocket from being tuned around one unusually small sample.
Working-space view
Usable product span = cavity span − insert structure − functional clearance
This simple relationship keeps divider structure, edge zones and access space in the same discussion as packed quantity. The actual values should be confirmed from the selected tin, finished insert and representative products.
Height can remove space without changing the footprint
Width usually gets attention first. Still, vertical structure can create a hidden restriction. An insert floor can raise the product, while a lid pad or upper feature can reduce the remaining headroom.
For that reason, a section view is useful during design review. It shows the tin bottom, insert base, product body and closed-lid position together. One drawing can expose a height problem that several top views may miss.
Real CR Tin examples
Four Product Structures Show the Difference
Real product examples make the space question easier to understand. These four CR Tin formats use different internal approaches, from defined product positions to simpler direct packing and a cylindrical cavity.
The point is not that one structure is always more space-efficient. Each format changes how much of the cavity remains available for the product, how the first unit is removed and how movement is controlled.


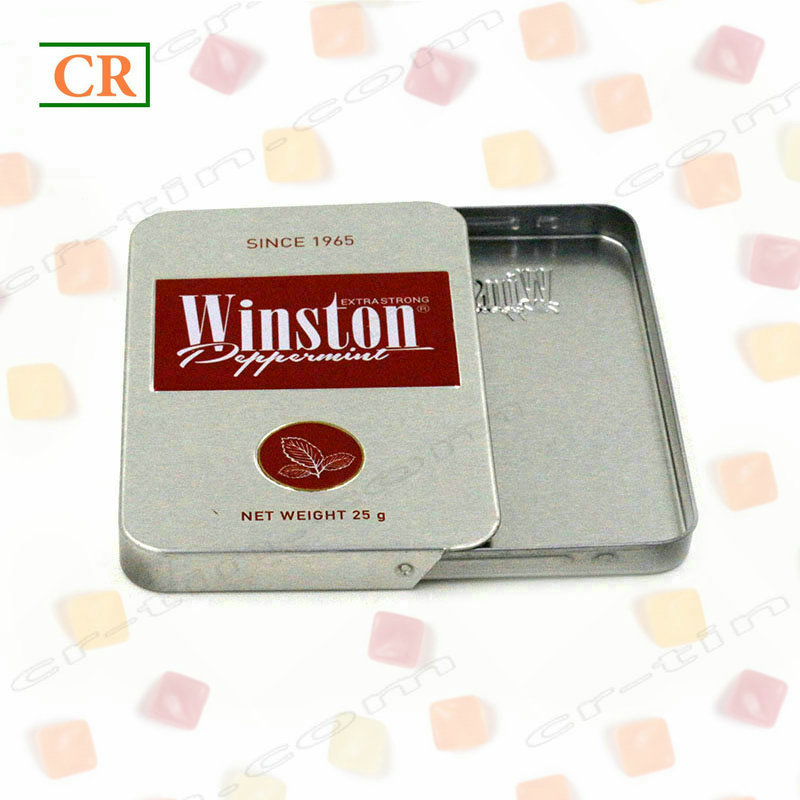
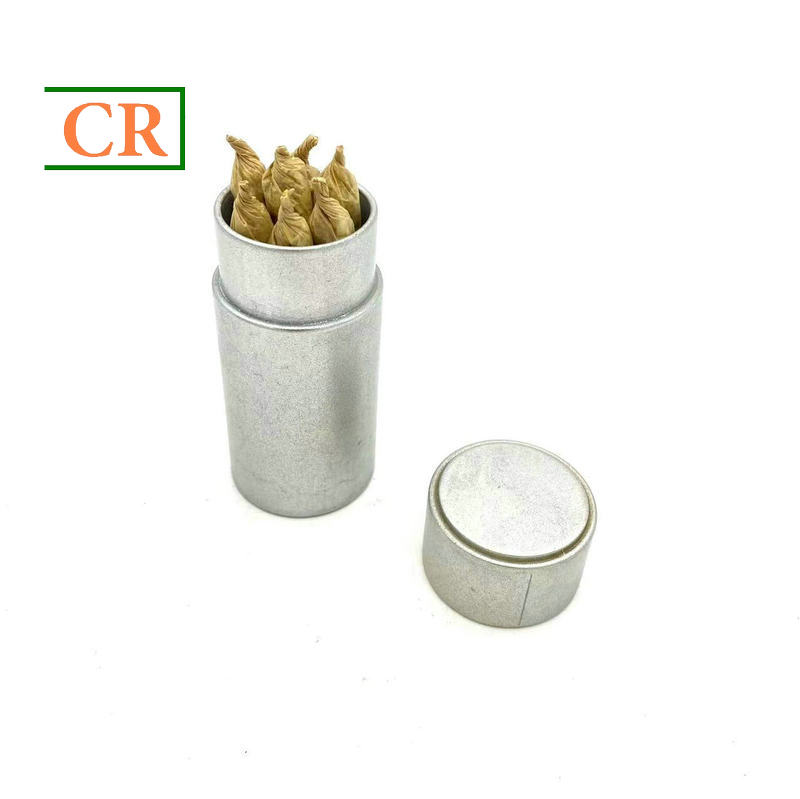
What these examples show: usable space cannot be judged from the tin shell alone. The insert or packing method, product orientation, removal path and movement-control features all change the working envelope.
Material changes geometry
Paper, Metal, PS and Foam Insert Structures
Insert material should be judged by the finished structure. Paper can create several functions through folds and bridges. Metal can form rigid ribs and holders. PS can create defined pockets. Foam can adapt to some product variation through compression.
Even so, no material automatically wins on space. The real comparison is between finished geometries. A thin material with large folds can use more room than a slightly thicker structure with compact contact points.
Paper insert: count the folded stack-up
Paper becomes interesting when one converted piece can separate products and support the presentation at the same time. However, a flat dieline does not show the final stack-up. One divider may fold back and create more wall thickness than expected.
During a packing trial, watch the last unit entering the array. If that piece pushes nearby folds outward, the assembled insert is consuming more room than the original flat drawing suggested.
Metal insert: look at the formed transition
Metal can create compact holders, ribs and retaining edges. Still, formed geometry needs transitions between surfaces. The top of a divider may look narrow while the radius underneath occupies more of the cavity.
For that reason, a section and top view should be read together. A small contact ridge in the right location can sometimes perform the work of a much larger continuous wall.
PS insert: compare the pockets with the open areas
A formed PS insert can turn an open cavity into clearly defined product positions. Yet the pocket webs and outer flange also occupy room. In a tight rectangular format, that perimeter structure can become an important part of the capacity calculation.
The hinged six-pack example above makes the space trade-off visible. A holder occupies part of the cavity, while other sections may remain intentionally open. Those open sections are not automatically waste. They can support separation, access or another defined packaging function.
Foam insert: consider compression as part of the fit
Foam can adapt to some dimensional variation because its walls compress around the product. On the other hand, more cushioning also means more occupied volume. A snug pocket may look secure during a static review while making repeated removal unnecessarily difficult. Actual wall thickness, compression and working clearance should be confirmed on the physical sample rather than assumed from the material name alone.
Reserve room for the hand
Wall Thickness, Finger Notches and Removal Space
A packed tin can work perfectly on a drawing and still fail at opening. The products fit. The insert holds them. Yet the center piece may sit too deep between neighboring walls. Without a practical grip area, good capacity becomes poor usability.
A finger notch creates a controlled opening in that structure. It gives back a small amount of internal material space so the product can be reached naturally. In compact multi-unit layouts, that trade can be much more valuable than squeezing one extra fraction of space from every lane.
Fit and access are two different checks.
A product should fit inside the cavity and still have a clear removal path.
Design the removal motion first
Some products lift straight upward. Others are easier to remove by tilting one end first. A side opening, an end relief and a center notch therefore create different handling experiences.
The first product removed deserves particular attention. Once one lane is empty, the remaining products gain more room. That later condition can make a weak opening system look better than it really is.
Wall height and access need to work together
Higher walls can improve lateral control, but they also cover more of the product. A lower section near the grip area can sometimes retain the product while opening the hand-access path. The goal is not the tallest wall. It is the smallest structure that performs the required job.
Capacity depends on product pitch
5-Pack and Multi-Unit Layout Decisions
Five products do not simply equal five product diameters. Four internal separation zones appear between those products. The two outer edges also need enough structure to stop unwanted movement or provide a usable opening.
Product pitch is a better planning concept. It represents the repeating distance from one product center to the next. Unlike a basic diameter calculation, pitch can include the product body, divider thickness and local clearance.
Parallel orientation
Parallel placement is easy to read and usually straightforward to load. Yet tapered products can create a bottleneck when all wider sections line up. The narrow ends may show generous gaps while the widest section controls the whole row.
A top view makes this easy to spot. The layout should be reviewed around the widest practical product area rather than around the smallest visible gap.
Alternating orientation
Reversing neighboring tapered products can spread wider sections across the array. In some layouts, that produces a better use of width. However, the presentation becomes less uniform and removal access can change.
The comparison should keep the same product envelope, count and edge conditions. Otherwise, a layout may appear more efficient simply because it started with a different set of assumptions.
Staggered placement
An offset arrangement can move wider product sections away from one another. However, width saved in the middle may become extra length at one end. The complete cavity therefore needs to be reviewed before the stagger is treated as a true space saving.
Secure without overfilling the cavity
Movement Control During Transport
Once the lid closes, the insert has another job. It should keep products from moving excessively while still allowing practical loading and removal. Those goals can conflict when every cavity is designed too tightly.
Movement is easier to understand by direction. Side-to-side motion suggests a lane-spacing issue. End-to-end travel points toward an open lengthwise path. Vertical movement appears when products can lift away from their support area.
Lateral movement
Check contact between neighboring products and movement against the sidewalls.
Axial movement
Check repeated contact at the product ends when the pack shifts lengthwise.
Vertical movement
Check whether products lift away from the support surface.
Test the complete loaded pack
An empty insert can appear loose and become stable once the full product count is loaded. The reverse can also happen. Products can push dividers outward and create friction points that were not visible in the empty state.
During sampling, close the tin and observe several relevant orientations. Then reopen it and inspect exact product positions. Look for rubbing, shifted lanes, lifted insert sections or one product sitting noticeably higher than the rest.
Patterns are more useful than isolated sounds or impressions. If the same contact mark appears in the same location across several pieces, the issue is more likely structural. That gives the next revision a clearer direction.
The physical sample settles the question
Sample-Fit Checks Before the Layout Is Frozen
CAD is excellent for comparing concepts. Still, loading, removal and movement become much clearer in a physical sample. Flexible wrapping, surface friction and small product differences can change the result.
The strongest test looks like ordinary packing. The complete quantity goes in. The lid closes. The first product comes out. Then the pack is handled and inspected again.
Seven practical checks
- Measure representative finished pieces. Record length, widest body area and important shape variation.
- Load the full count. Watch the last unit entering the array.
- Remove the first unit. Check the real grip point and removal path.
- Close the tin. Look for contact between product, insert and lid.
- Change orientation. Observe movement without relying only on sound.
- Reopen and inspect. Look for repeated rubbing, insert lift or shifted products.
- Record the revision. Tie observations to the exact insert version.
Useful information for an insert-layout brief
- Finished product length.
- Maximum practical body diameter or width.
- Required product count per tin.
- Preferred product orientation.
- Preferred insert material, when already known.
- Need for individual lanes or shared channels.
- Known loading, removal or movement concerns.
- Any child-resistant, airtight or other packaging requirement that affects the tin format.
Record the problem behind the change
“Fit approved” does not explain why a sample worked. A better record says what happened. The fifth unit may feel tighter. The center lane may need more finger access. The insert may lift slightly when one product is removed.
Specific observations make the next revision faster. One clear issue can lead to one targeted geometry change. That is far more useful than changing several dimensions at once.
Compare the complete system
Choose the Simplest Insert That Works
The strongest insert is not always the one with the most pockets. A simpler support can create more usable room when the product already sits naturally inside the cavity. Conversely, a dense multi-pack may need defined lanes because the open cavity would allow too much movement.
Capacity, removal, movement and assembly should be considered together. A design that wins on one point can still create a weakness elsewhere.
Capacity
Does the full count fit after the structure is added?
Removal
Can the first product leave without awkward contact?
Movement
Does the structure control motion without over-gripping?
Assembly
Does the layout remain practical during packing?
Continue the packaging review
Related Reading
Product formats
Pre-Roll Tin Boxes
A broader CR Tin overview of pre-roll tin formats and packaging structures.
Insert examples
Certified Child Resistant Tin Boxes for Pre-rolls
A separate article showing different pre-roll tin structures and inner support approaches.
Structure comparison
Pre-rolls Tin Box Packaging
A related discussion of regular, child-resistant and airtight packaging structures.
Common insert-space questions
FAQ
Keep the next revision focused
Final Takeaways
Insert design changes much more than internal appearance. It determines how the cavity becomes usable product space, how products share that space and how the first unit leaves the pack. A full cavity is not automatically an efficient cavity: the strongest layout balances capacity with movement control and practical access.
- Start with the finished product. Use the real length, widest practical body section and expected size variation.
- Reserve functional space early. Include dividers, edge zones, finger access and movement clearance before declaring the count workable.
- Approve the loaded sample. Check the full quantity, first-unit removal, closed-lid condition and movement before freezing insert geometry.
Send product dimensions / request a sample
Start With Product Size, Quantity and Layout Direction
A useful insert brief can stay simple. Product length, maximum body diameter, packed quantity, preferred orientation and insert preference provide the key starting information. If the project also has a child-resistant, airtight or other packaging requirement, include that as well. Representative physical samples can then show whether the structure leaves enough room for loading, removal and stable positioning.
For the next pre roll tins project, send the finished product dimensions together with the required count, arrangement direction and preferred insert type. That gives the layout review a clear engineering starting point before the sample is finalized.
Post time: Sep-16-2026