
A child-resistant tin can look just like the approved sample yet open differently after a forming adjustment, an assembly change, or several hours on the production line. That is why lock consistency involves more than checking whether the lid opens. The important question is whether it still engages, releases, and returns as intended—and whether a change can be traced before it affects more of the run.
The practical answer
The approved sample shows how the lock is meant to behave; the documented acceptance criteria establish how much variation production can allow. A useful comparison looks beyond a lid that simply opens or closes to its engagement, release point, springback, alignment, and behaviour on the next closure. What matters depends on the specific lock design.
At the sampling stage, the team is effectively defining what normal operation looks and feels like for this particular design. The seated lid, the point of release, and the way the mechanism recovers become meaningful references only when they are tied to an approved condition. That gives later production checks something more reliable than recollection or the most recent finished piece.
A simple pass/fail entry can also conceal an early change. A lid may still open even when its release comes slightly later or one side returns less decisively. A short observation linked to the run is much easier to investigate than a series of identical checkmarks.
There is also a clear boundary between manufacturing QC and regulatory testing. The U.S. Consumer Product Safety Commission explains that special-packaging requirements are governed under the Poison Prevention Packaging Act and related rules, while CPSC does not itself approve or endorse a specific package or manufacturer. For regulatory interpretation, the official CPSC Guide to Special Packaging is the appropriate reference.
Start with the functional geometry
Define the Lock Features to Observe
Two tins can look similar when closed and still rely on quite different locking geometry. On a button-operated design, uneven movement between the two sides may be telling; on a concealed lock, the contact between a slot and its mating edge may matter more. The approved construction, rather than a generic checklist, has to determine what is worth comparing.
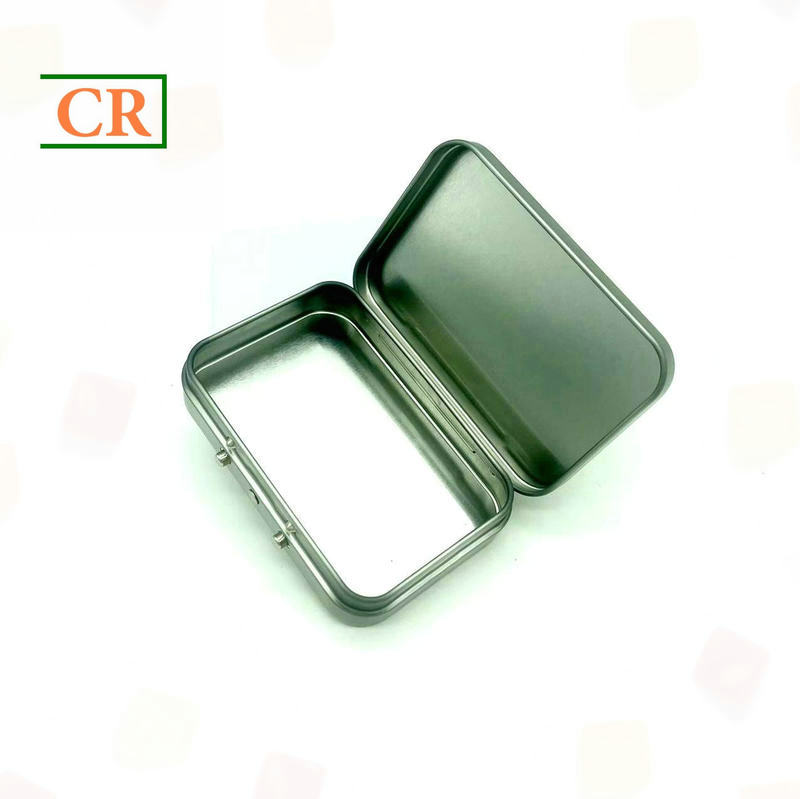
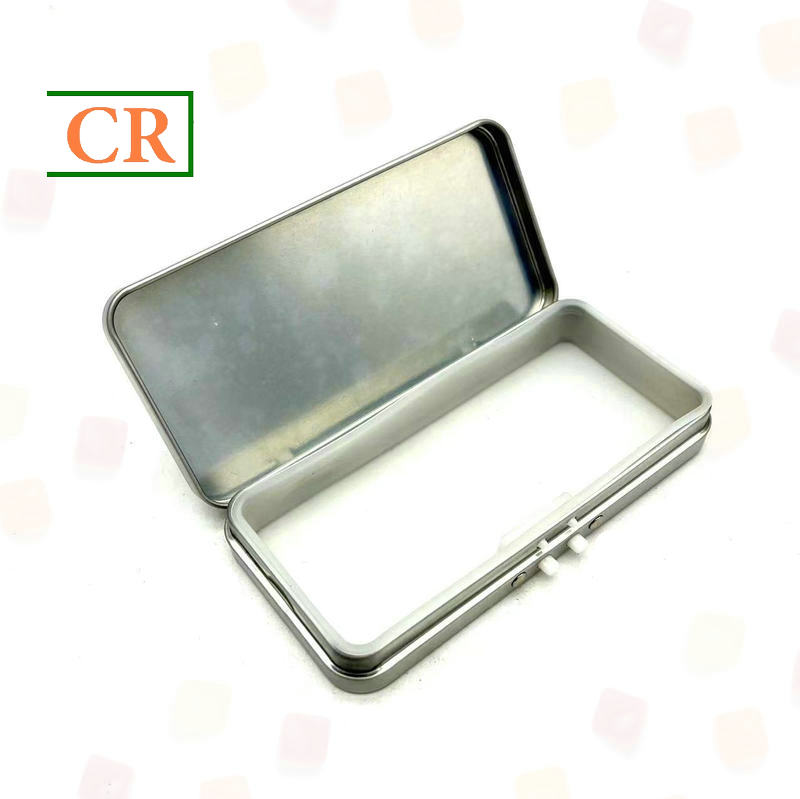
For a hinged tin with buttons, the useful points may include button position, button movement, engagement at each side, lid seating, and return after release. For a hidden-slot construction, the focus may move toward slot location, mating edges, engagement depth, and the relationship between lid and body. The exact inspection points should always come from the approved design.
|
01 · Engage Closed PositionCheck whether the lid reaches the same seated position and whether the locking features meet as expected. |
02 · Release Opening ActionObserve activation, resistance, release point, travel, and any unusual contact or interference. |
03 · Recover SpringbackCheck whether the relevant feature returns toward its reference position after the opening action. |
Follow the complete lock path
A small shift in one formed feature can change where the lid first catches, how the lock releases, or whether it seats properly the next time. Looking at a button or slot in isolation may miss that chain of effects. The full sequence—engagement, release, recovery, and reclosing—shows whether the parts still work together.
Visual features can also be misleading. A button may look correctly centered while its surrounding panel has moved slightly. Likewise, a slot may appear acceptable from one angle while its mating edge sits differently inside the closed structure.
The product construction should be the starting reference. CR Tin lists hinged structures with visible metal buttons as well as other child-resistant mechanisms, so the inspection sheet should be linked to the exact tin model under review rather than copied from an unrelated package.
Tactile behaviour reveals early drift
Opening Feel, Springback and Alignment
A lid may look perfectly aligned and still become noticeably harder to release. Calling it ‘tight’ or ‘stiff’ does not say much about the problem. A more revealing distinction is whether resistance rises before the button moves, at the release point, or as the feature returns.
For example, activation may begin normally while the release point arrives later than the reference. In another sample, the initial movement may feel similar, yet the metal feature returns more slowly afterward. Those two observations point toward different areas for investigation.
Better inspection language
“Release starts at the expected point, but resistance is higher than the approved reference. The side feature also returns more slowly after release.”
Compare the first and next opening cycles
One smooth opening says little about the next closure. If a formed feature does not recover fully, the following cycle may feel different even though the first looked normal. Comparing consecutive cycles under the same handling conditions can bring that difference to light.
If the lock changes after one cycle, the record should capture that change. A mechanism that feels acceptable once but behaves differently after operation may need closer engineering review than a mechanism that remains stable.
Check springback without guessing the cause
The metal feature flexes during opening and moves back toward its starting position afterward. That springback matters because an incomplete return can change the next closing or release action. A visible difference after opening is therefore worth investigating, even if the first cycle felt normal.
The safest record separates observation from diagnosis. “Feature remains slightly lower after release” is an observation. “Tooling caused it” is a conclusion that still needs evidence. This distinction keeps the investigation focused and avoids unnecessary adjustments.
Check alignment from a fixed view
Slot alignment and button alignment become much easier to compare when the sample orientation stays fixed. Reference photographs can show the approved position, while the physical sample remains the standard for tactile behaviour. This combination reduces differences between inspectors and shifts.
Where two locking points are present, inspect both separately. One side may remain stable while the other moves. A single overall judgement can hide that asymmetry.
Build the baseline before production
Set the Approved Sample as the Baseline
A signed-off drawing can tell a production team where a feature belongs, but it cannot fully convey how a particular lock feels as it releases. The approved physical sample captures that missing part of the design intent. It is especially valuable when an apparently minor variation does not show up clearly in dimensions alone.
The identity of that reference matters months later. A project number, structural revision, approval date, and approval status help distinguish it from earlier prototypes or later changes, as required by the quality system. The sample also needs protection: frequent opening can gradually alter the very lock behaviour it is meant to represent.
Keep a protected master reference
A practical setup uses a protected master sample plus a working comparison sample. The working sample supports routine inspection, while the master protects the original approved condition. When the working piece changes, the master can confirm whether it still represents the accepted state.
This matters because reference drift can happen quietly. If each new production run is compared with an already worn or altered sample, small deviations may become accepted simply because the baseline has moved.
Define what approval actually covers
Approval should identify the functional characteristics that remain controlled during production. These may include closed position, engagement, opening sequence, opening feel, springback, slot alignment, button alignment, and reclosing behaviour. Any quantitative limits should come from controlled engineering documents.
Photographs are particularly useful for alignment. A close-up can show the approved button position or slot relationship at a consistent angle. Still, photography does not replace a physical reference when tactile behaviour matters.
This baseline also supports repeat orders. When the same structure returns months later, the approval record can point back to the correct physical condition instead of relying on an old production piece or memory.
Check at meaningful production points
Sampling and In-Process Consistency Checks
A good startup piece cannot speak for an entire production run. Tooling wear, changes in feed position, assembly adjustments, or maintenance can alter the lock later in the shift. Sampling at meaningful intervals and after such events gives a clearer picture of the behaviour customers will actually receive.
There is no useful universal number of tins to check per hour: frequency, sample size, and acceptance criteria depend on the approved quality plan for the design. Comparisons still need consistent handling, particularly for engagement, alignment, release, and recovery. Where a characteristic has a specified tolerance, feel alone cannot settle the result. The plan must also make clear when a deviation calls for further inspection or a production hold.
Sample real production, not only ideal pieces
A handful of clean-looking pieces may say little about a problem confined to one forming position or assembly station. Samples need to reflect what the line is actually producing. Where multiple tools or stations can affect the lock, the approved plan should account for those differences rather than treating the output as one uniform group.
Restarts deserve attention as well. After a stop, maintenance activity, tooling adjustment, or setup change, the process may no longer match the earlier condition. A defined recheck can identify that difference before a large quantity is produced.
Use descriptive records
A pass/fail result supports a quality decision, but it does not explain a developing trend. ‘Opening remains stable, but the right button sits slightly lower than the reference’ gives engineering a concrete symptom to investigate without claiming to know the cause.
This approach also makes trend analysis easier. Several small observations over time can reveal a gradual shift before a full lock problem appears.
Keep production history visible
Record Structural or Tooling Changes
A routine tool service may leave the finished lock unchanged—or shift a contact point just enough to alter its release. The same uncertainty follows a forming or assembly adjustment. When a difference turns up later, the timing of those events can be more useful than a general note that the mechanism feels different.
A useful record answers four practical questions: what changed, when it changed, why it changed, and what the verification sample showed afterward. Supporting photographs and marked drawings can make the record much easier to understand later.
|
What The ChangeDescribe the affected tool, structure, setting, or process condition. |
When The TimingLink the change to a date, production stage, restart, or identifiable run condition. |
Why The ReasonState whether the event was a correction, maintenance action, setup adjustment, or structural revision. |
Result VerificationRecord how the post-change sample compared with the approved baseline. |
Separate correction from structural revision
A process correction may simply restore the accepted condition. A structural revision is different because it can create a new physical condition. Keeping those events separate prevents two different lock behaviours from sharing one sample identity.
When the structure changes intentionally, the approved reference may need to change as well. The applicable quality procedure should determine whether a new sample, drawing revision, or additional approval is required.
The benefit appears later during repeat production. A revision-linked sample and change record give the next run a traceable starting point rather than forcing the process to rely on informal descriptions.
Move from inspection to investigation
What to Do When Lock Behaviour Drifts
A lock that begins releasing later than the reference is showing a symptom, not identifying its own cause. The source might lie in a mating edge, a surrounding panel, or a recent process change. Before making adjustments, the team needs to know which production pieces may be affected and what evidence can narrow the search.
When a critical locking characteristic falls outside the approved acceptance criteria, identify and segregate the affected production under the applicable quality procedure. Retain the latest verified acceptable sample and trace production records to determine when the deviation first appeared. Suspect products should not be released until the deviation has been evaluated and their disposition approved by the responsible quality personnel.
Describe the symptom precisely
- Opening resistance is different from the approved sample.
- Release begins at a different point in the opening sequence.
- Springback becomes slower or less complete.
- A slot or mating feature appears displaced.
- A button sits differently or travels unevenly.
- The next closure no longer matches the reference condition.
These descriptions give engineering a starting point. A clear photograph can document alignment. A retained physical piece can preserve opening feel. A timestamp or production reference can show when the difference first appeared.
Find the transition point
The most revealing comparison is often between the last verified acceptable piece and the first affected one. The production history between them may reveal a tool service, line stop, setup change, or assembly adjustment. That narrows the investigation without treating the first visible symptom as proof of its cause.
The mechanism should then be reviewed as an interacting system. A button difference may involve the surrounding panel. A slot difference may involve the mating edge. A lid-position problem may influence both engagement and opening feel.
Verify the correction
The first corrected piece should not automatically close the investigation. Follow-up samples should confirm that the locking mechanism remains consistent with the approved reference and documented acceptance criteria. If changes to materials, manufacturing processes, or the closure configuration could affect child-resistant performance, the responsible finished-product manufacturer should assess whether formal retesting or recertification is necessary. Routine production checks do not replace that evaluation.
Once the condition is verified, the correction and evidence should stay linked in the change record. This creates a usable production history for future runs.
Turn sample approval into production control
Build a Clear Acceptance Record
The real test of an acceptance record comes when someone on another shift, or in another production run, must make the same judgement. A sample number and photographs establish what was approved; clear criteria explain which differences matter and when quality or engineering needs to review them. Without that context, a signed-off sample can still leave too much to interpretation.
The record can include the sample code, revision, approval date, reference photographs, and the functional observations agreed during development. Where drawings or specifications contain controlled measurements, those documents can be linked to the same record.
Use observable acceptance language
“Lock works normally” is too broad for useful production control. A stronger statement might specify that release occurs at the expected stage, springback returns toward the reference position, and left and right engagement remain aligned with the approved sample.
That precision becomes especially useful when the issue appears midway through a run. Quality staff can identify which pieces need review, while engineering can examine a specific change in release or engagement rather than guess what ‘not quite right’ was intended to mean.
Retain physical and visual evidence
A retained sample shows physical behaviour. Photographs show structure and alignment. The combination is stronger than either one by itself. It also helps distinguish normal visual variation from meaningful movement in the functional area.
When the package is redesigned, the old reference should not silently remain active. Revision control keeps the physical sample, inspection sheet, and production record aligned.
Choose the right starting point
Which Packaging Projects Benefit Most From This QC Approach?
The greatest value often appears after the first sample has already been approved. A repeat order, a different production setup, or a tooling revision can all raise the same question: does this batch still behave like the one the buyer accepted? That question is harder to answer without a stable reference and a traceable production history.
For packaging engineers and quality managers, those records connect design intent with day-to-day production. For procurement and brand teams, they make discussions about repeat orders and sample revisions more concrete. Instead of relying on a general assurance that the lock has not changed, everyone can refer to the same accepted behaviour.
New Packaging DevelopmentUseful when the lock reference needs to be established before production release. |
Repeat ProductionUseful when an existing structure must reproduce the same physical and tactile condition over time. |
Tooling RevisionUseful when a structural or tooling change needs clear before-and-after verification. |
The best package choice still depends on the actual contents, required size, opening style, and structural design. Once the physical structure is selected, the lock checklist can be built around that specific package instead of relying on a generic QC form.
Further reading
Related Reading and Reference Sources
|
Official regulatory reference CPSC Guide to Special PackagingUseful for understanding the distinction between manufacturing inspection and formal special-packaging requirements. |
Regulatory questions CPSC Special Packaging FAQsUseful for reviewing formal test protocols, special-packaging definitions, and certification-related responsibilities. |
Before production release
Three Practical Actions Before Mass Production
By the time a tin moves from sampling into mass production, the team should be able to explain what the lock is meant to do and how it will recognize a meaningful change. A short record that people actually use is more valuable than a detailed form that leaves critical decisions open to interpretation.
- Approve and label one physical lock reference. Record the closed condition, opening sequence, opening feel, springback, alignment, engagement, and reclosing behaviour that define the accepted state.
- Build sampling around real production stages. Compare startup pieces, in-process samples, post-adjustment pieces, and final samples against the same approved condition.
- Record every meaningful change. Link tooling or structural changes to dates, affected samples, inspection observations, and post-change verification.
The value becomes clear when a later batch feels different despite using the same nominal design. Instead of debating whether it is ‘close enough,’ the team can compare the evidence, find the likely change window, and decide what needs further review.
Practical questions
FAQ
Does a consistent opening feel prove certification?
No. Opening feel is a production consistency observation. It does not prove that a package has passed a formal child-resistant test. For U.S. requirements, the CPSC explains the relevant special-packaging framework and testing requirements under the PPPA and 16 CFR Part 1700.
Which lock details should be compared with the approved sample?
The exact list depends on the mechanism. Common comparison points include closed position, engagement, release movement, opening feel, springback, slot alignment, button alignment, mating-feature position, and reclosing behaviour.
How should production changes be recorded?
Record what changed, when it changed, why it changed, and what the verification sample showed afterward. Where useful, attach photographs, marked drawings, tool references, and retained before-and-after samples.
What happens if lock behaviour drifts?
Keep the affected production range identifiable, compare suspect pieces with the approved reference, and locate the transition point between acceptable and affected samples. After any correction, verify several new samples against the same baseline and update the change record.
Next step
Request a Sample Before Finalizing the QC Routine
A physical sample lets a buyer or packaging engineer experience the actual locking action before agreeing on production checks. Details such as how the lid engages, where it releases, and how it closes again are easier to discuss with the real mechanism in hand.
For projects using child resistant tins, the practical next step is to review the relevant physical structure first. The approved sample can then become the baseline for production sampling, lock QC, change records, and repeat-order verification.
For a useful sample discussion, bring the intended contents, tin size, opening preferences, and any existing acceptance requirements. These details help connect the choice of lock structure with the checks that will matter once production begins.
Post time: Oct-16-2026